After a previous blog about trying to add a Voki to my blog, Sharon suggested I write instructions about this for others.
Next, create an account by filling in the box in the top right corner.
After you have set up an account, log in and you will be taken to the home page.
Along the top of the page there is a button which says 'Create'.
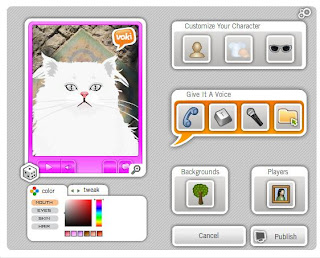
A Voki will appear on the page with 'Customize your character' buttons next to it.
Change your character's appearance and give it a voice by using these buttons.
When you have finished creating the Voki, click 'Publish'.
Name your Voki in the box provided and press 'Save'.
Once the Voki is saved, there will be a box containing a HTML code under the title 'For Most Sites Use This Code'.
Highlight and copy this code. Go to your blog homepage. In the top right corner next to the 'New Post' button, there is a 'Design' button.
Click the 'Design' button and you will be taken to a page with a layout of your blog.
At the right hand side of the page above the boxes 'Followers', 'Blog Archive' and, 'About Me' there is a button which says 'Add Gadget' Click this button.
A box will then pop up with options, scroll down until you find the button for 'HTML/Javascript'.
When you click this another box will appear. In this box, name your Voki and paste the HTML code into the 'content' box.
Press save and view blog!


